Tip: Overexpose for low-light shooting

I often shoot sports in low light, whether it’s a Friday night high school football game or a dark high school gym. Because of this, I’m very sensitive to high ISO and noise. One of the main techniques I use is to overexpose the photo slightly and then bring things back down in Lightroom post-processing. Underexposed photos tend to show a lot of noise, which is often hard to fix well in Lightroom. But, if you intentionally overexpose the photo, the shadows/dark areas will look better in post-processing, and you can then bring down the highlights and often increase the exposure for nice results.

Here’s how things look on my camera

I shoot in Manual mode for sports. For most sports, I set the shutter speed around 1/800-1/1,000 sec. and the aperture at f2.8 and use Auto ISO (with a max. cap at 6400). I then set the Exposure Compensation somewhere around +2/3 to +1 of a stop. So, the camera determines the correct exposure based on these settings, and then overexposes it by that amount. I’m then able to do the adjustments in Lightroom as mentioned above.

Note: In order to do this, you have to use Auto ISO, and not all cameras support using this with the Exposure Compensation feature together.

Two eyes and a ball

You’ve heard it before in sports photography- a good photo shows two eyes and a ball. Well, maybe you haven’t heard that yet, so here you go, now you have.

Sports photography is faster paced than studio or other still photography. It requires you to shoot quickly, make quick adjustments, be in the right position, shoot through the action to capture emotions, get good composition, and oh yeah, have a tack-sharp image.

Hmmmm. That sounds like a lot to do. Well, it is. But when you do it all, and get it right, it’s really rewarding. Unfortunately, a lot of times, it doesn’t all come together. Your photo keeper rate will be much lower for sports photography than just about any other genre. You might take 1,000 photos (or more) for an event and only come away with 25 5-star keepers (that’s only 2.5%). That sounds like a lot of work for a small payoff, but when you get those 25 5-star photos, it somehow makes it all worthwhile.

Continue reading “Two eyes and a ball”

My Canon microadjustment

The whole idea of manually calibrating a camera to a specific lens was pretty intimidating to me- until I tried it. Not only was it easier than I thought, but it made a HUGE difference in the quality of my photos.

I recently got a Canon 300mm f2.8 lens (yes, this is the Big Daddy, but please don’t confuse it with the Bigger Daddy, the 400mm f2.8 lens). For a few years, I could only dream of having a lens like this, and believe me, the version I got, although it has Image Stablilization (IS), which I don’t use for action sports, is by no means a new lens. This lens is as old as my 20 year-old college student daughter! But these things are workhorses, and if you take care of them, they will definitely take care of you.

So like any giddy sports photographer with a new toy like this, the first thing I did was take it out on assignment. I had a softball game and two football games to shoot that week, and no time to break it in and learn the in’s & out’s. I’d even been warned from the guy I bought it from that it might take some time getting used to it. Bah! No time for that- I had sports to shoot.

The softball game went ok. It was sort of hit or miss with the sharpness of my images. I chalked that up to being unfamiliar with the lens, and also being as close as I was to the field- this lens was almost too much for that game.

Trying to make some quick adjustments, I tweaked a few settings, like the autofocus point pattern I was using, and errr, I didn’t realize that I’d accidentally turned on the IS feature (did I mention you shouldn’t use this for action sports?!). Turn it off.

I had two football games in the same night for my next assignment and no time to spend fiddling around making too many more adjustments. The first game went pretty well. I had good light for most of the first half, and got some decent photos. But the second game is where I realized that I needed to do the microadjustment. After that game, I spent some time looking at my photos, pixel-peeping them at 100% and closer. I suspected that my lens was back-focusing (this is where the focus is sharper a little behind where your target is.

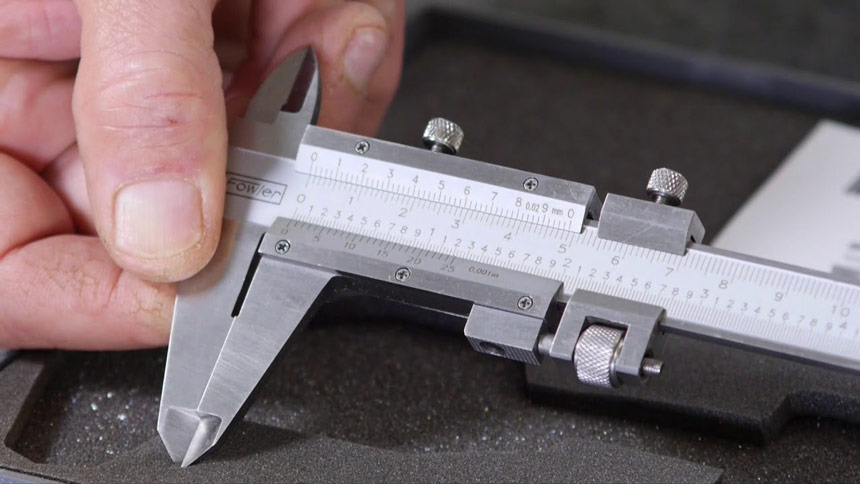
I decided to dive in and tackle the microadjustment. In my case, I used a combination of the Canon EOS AF Microadjustment Guidebook and Jeffrey Friedl’s Testing SLR Autofocus article. I printed the test chart from Jeffrey Friedl and once I had the results, I used the Canon EOS AF Microadjustment Guidebook to make the adjustments in my camera.

UPDATE: Since writing this post, I started using the Reikan FoCal software for microadjustments. You install it on your computer (laptop works well), and then you connect your camera with a USB cable. It uses a test image (included) which you can tape to a wall and then the software then controls the camera and runs through a sequence of test shots and finally shows you the best setting for each lens (and focal length for zoom lenses).

The way this works, once you identify the issue you’re having, either front-focus or back-focus, you then edit a setting in your camera’s menu to identify the specific lens and enter its serial number so that the camera matches up with the specific lens. You can also set your camera to use the same adjustment for all lenses, but I decided to do them separately.

After making this adjustment, I was anxious to get back out there and shoot some more. I was amazed at the results! I saw an immediate difference in the sharpness of my photos, and my keeper rate went up tenfold. Now, I’m discarding more in-focus photos due to composition rather than blurriness. And I love this 300mm f2.8 lens!

Here are the details of the ‘Before & After’
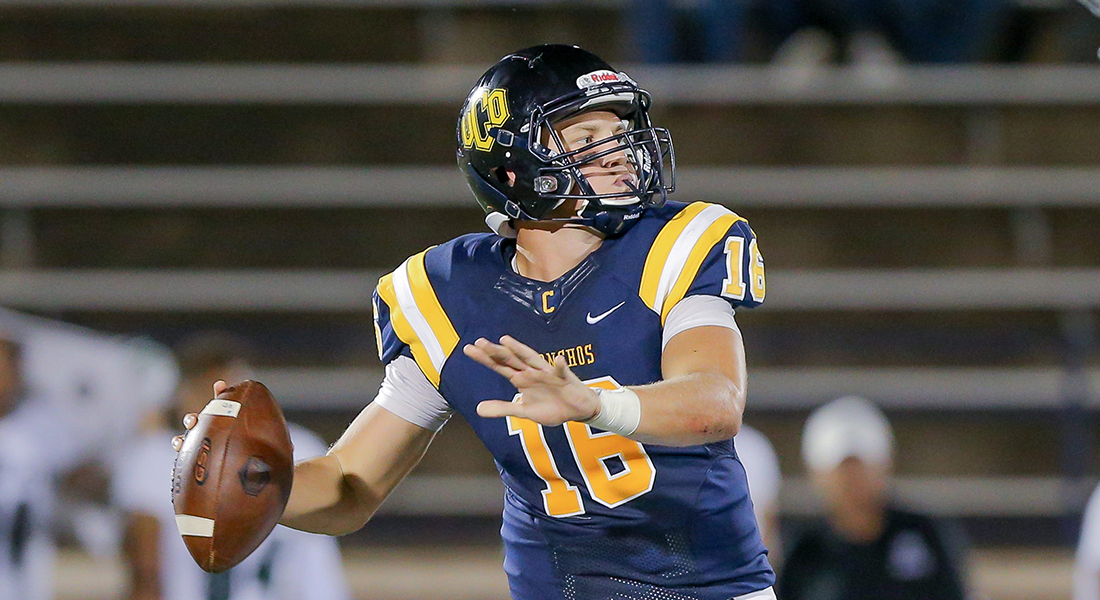
Before

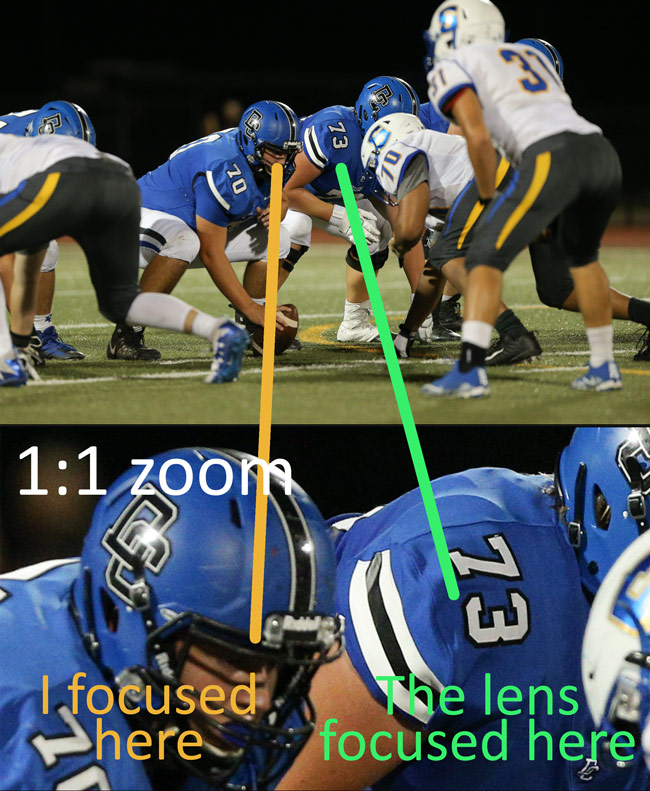
In this photo, I was focusing on the center snapping the ball. However, the lens focused on the left guard lineman next to him, a little farther back in the plane of focus. You can see this in the 1:1 zoom.

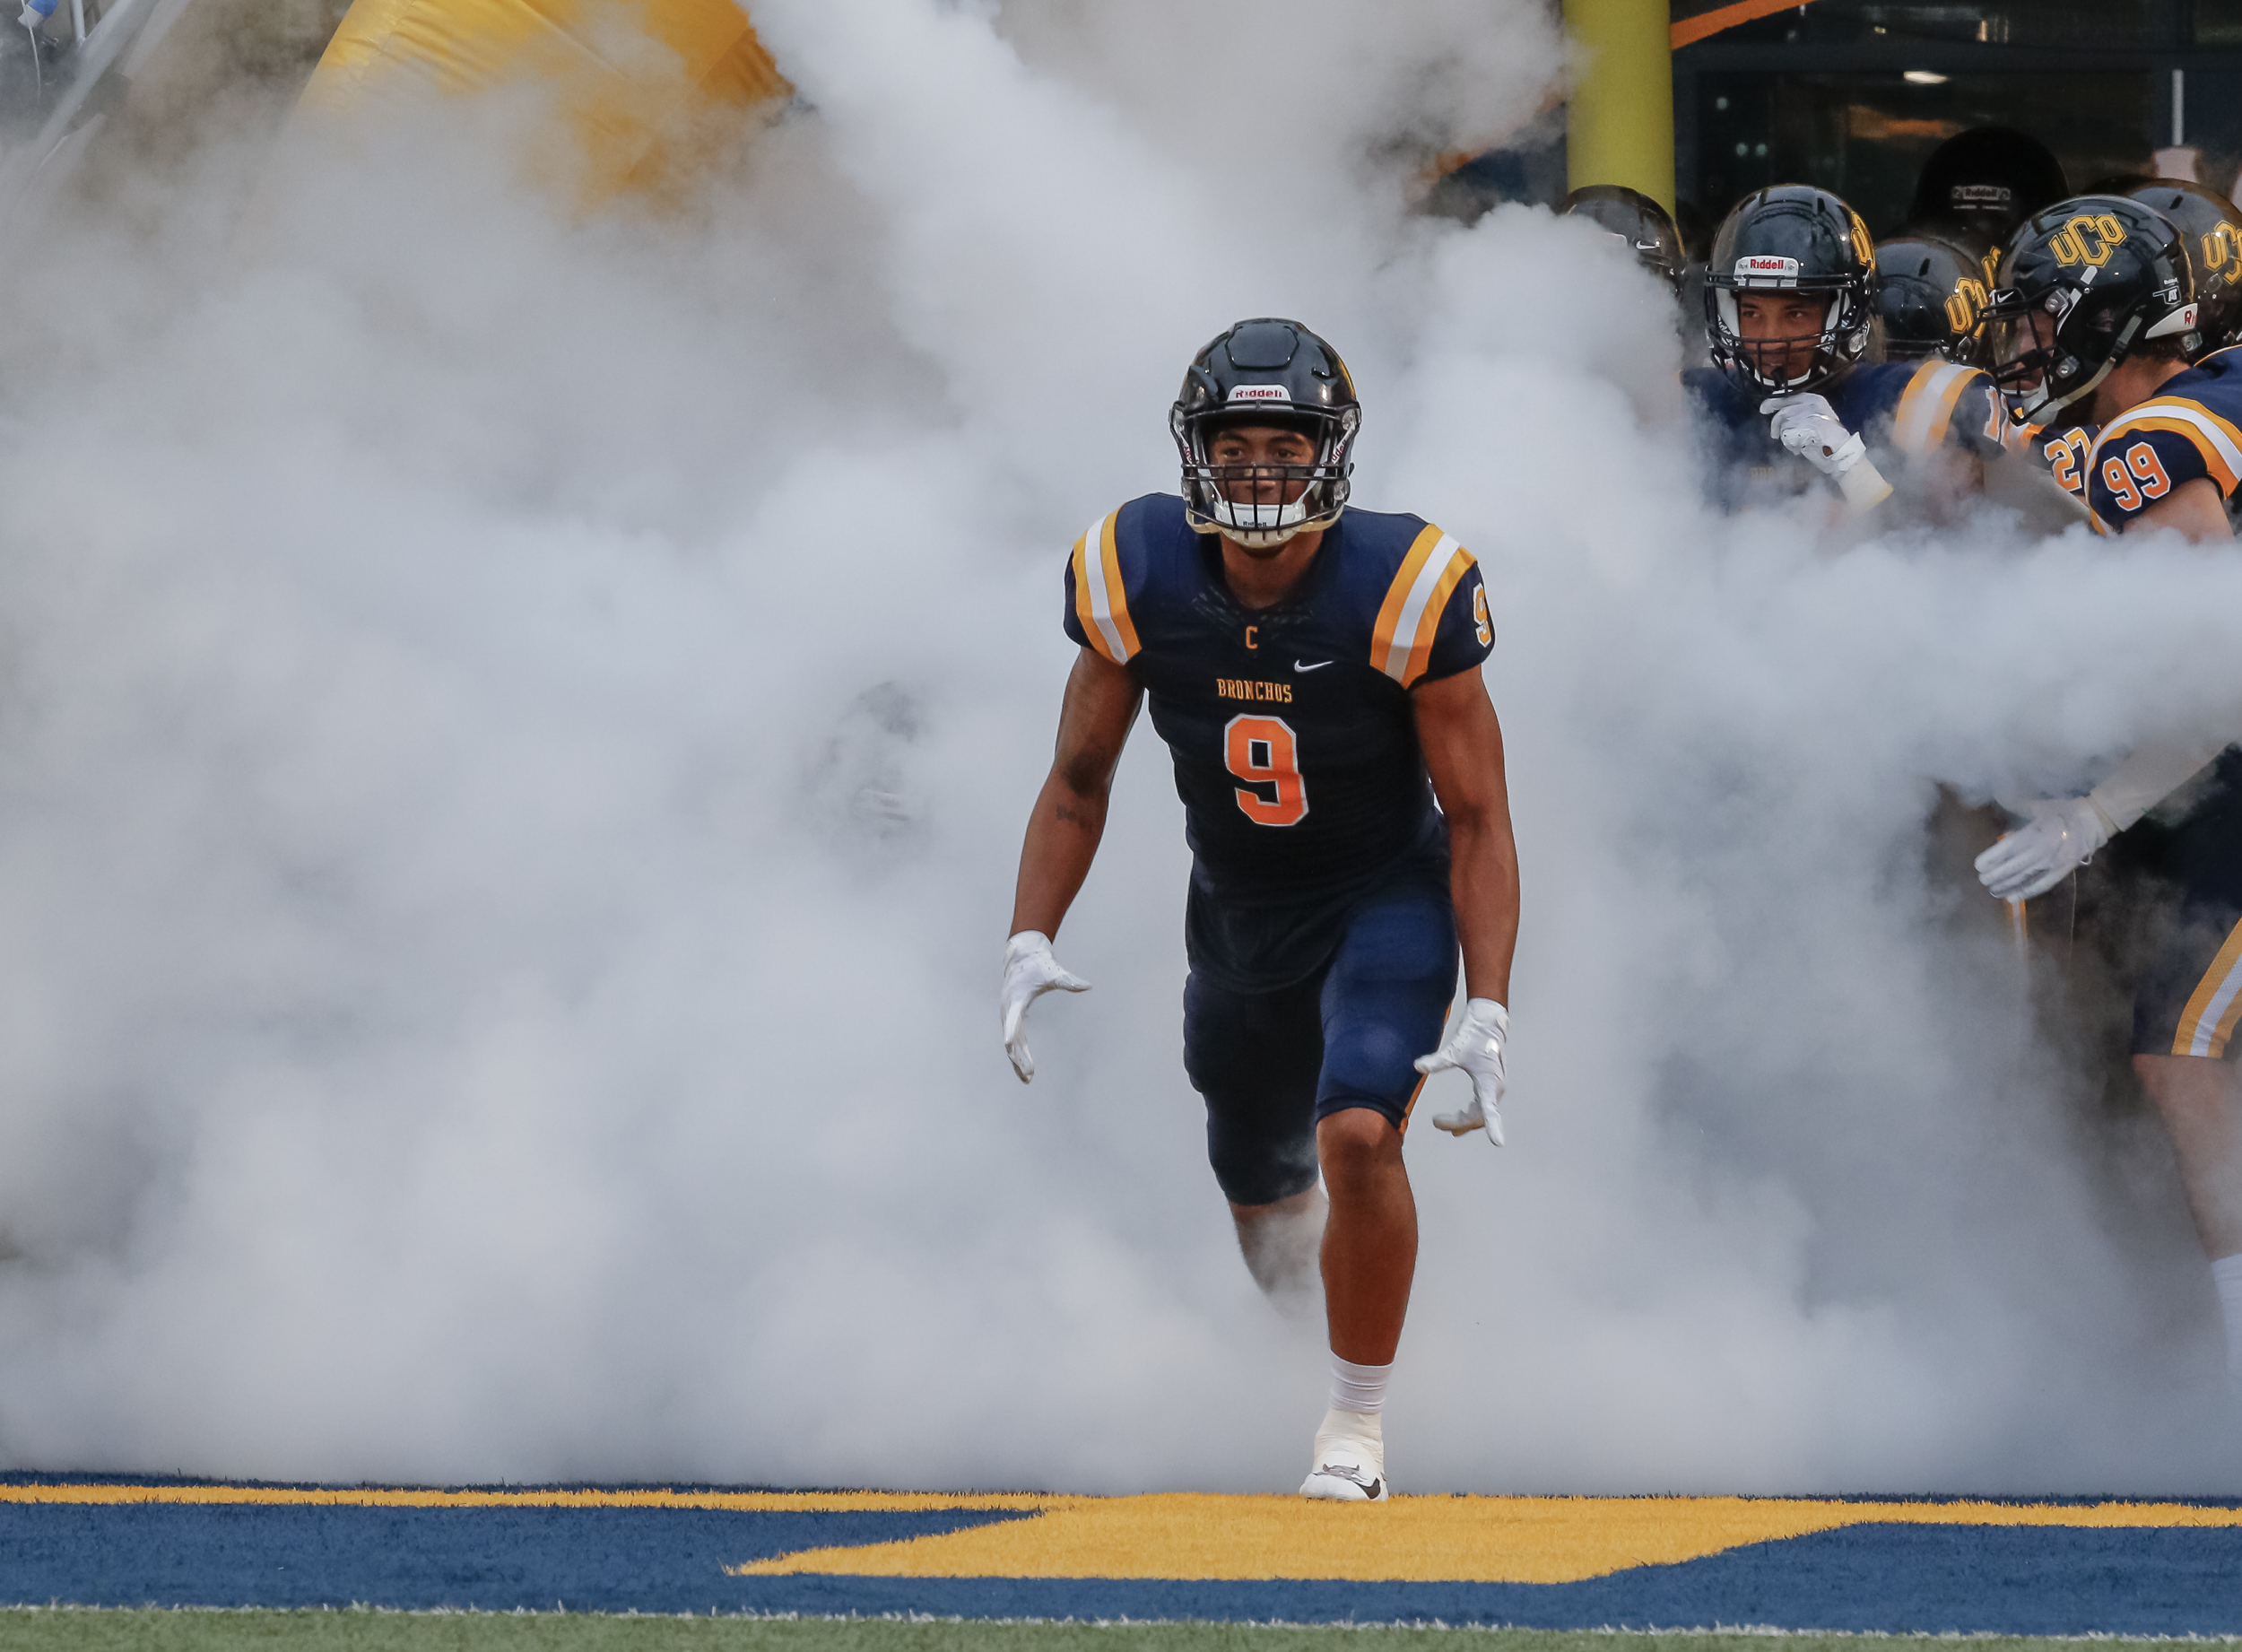
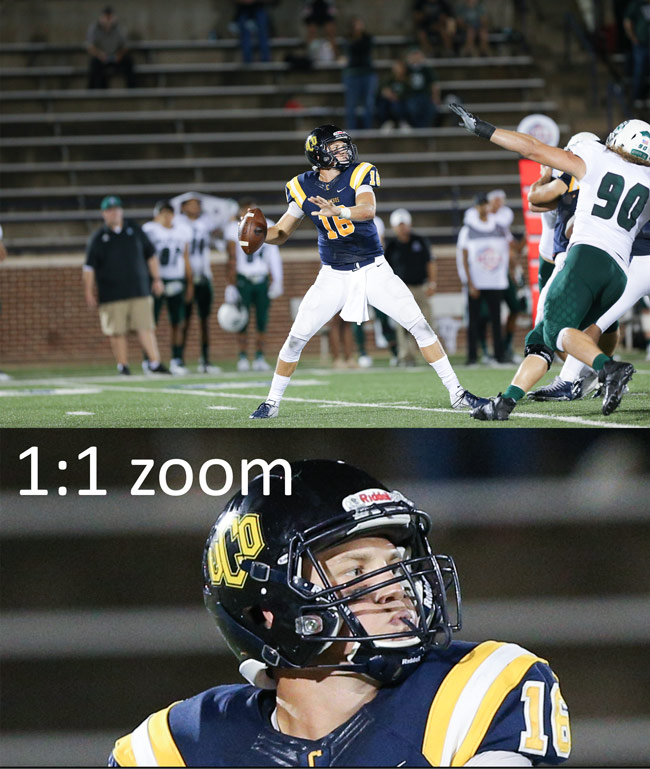
After the microadjustment was made, the spot I was focusing on was dead-on and I had many tack-sharp photos.

After

Of course, your mileage may vary, but I hope you have as good results as I did.

My first college football game

I recently had an opportunity to shoot my first college football game. This is just my second season shooting high school football, so I was excited for the chance to shoot at this higher level.

I didn’t really know what to expect. My biggest fear was not knowing the protocol- where I could and couldn’t shoot from on the sidelines, what kind of access I’d have on the field, etc.

I made sure to get to the stadium early to pickup my press pass and get settled into the press box. Most of my anxieties were squashed as soon as I met the Director of Sports Media Relations. He couldn’t have been nicer, and he answered all of my questions. I also met some of the team’s staff photographers, and they also went over some things to look for before and during the game. I was feeling better about things.

I like to be on the field about 30 minutes or so before a game starts. This gives me time to take some test shots, get my exposure settings right, and sort of feel out the atmosphere. I try to figure out where I want to be for the tunnel run, coin toss, and other pre-game stuff.

The weather wasn’t so good this night- it had been raining all day and the radar map didn’t show that it was going to let up. This meant I had to protect my gear, which makes shooting a little tougher since you can’t review shots as you go along as easily. Luckily, my deadline wasn’t until the next day, so I could just shoot away and review them all later.

Once the game started, I settled in, and after a few plays, it seemed to flow alot like the high school games I’ve shot. One difference about college vs high school sports is that they’re generally a little easier to shoot. The athletes are better, and the action is a little more predictable, which makes getting into position a little easier.

The game flow was good- both teams played pretty evenly through the first half. Luckily, I was in a good position for one of the home team’s scoring drives, and I was able to get a shot of a touchdown catch in the end zone, which made it onto the front page of the paper I was shooting for.

It was a great reward to be able to come away with something like that photo in the paper. I had a blast shooting my first college game and hope to be able to shoot some more this season.